
The Renovation Decisions That Prevent Budget Overruns Before Construction Begins

You finally decide it’s time to renovate. You picture the kitchen you’ve wanted for years or the open living space you can’t wait to enjoy. Then construction begins, and the budget starts creeping upward.
A renovation rarely gets expensive because of one tile or fixture. The trouble usually starts with decisions left unresolved before the first wall was opened: structural changes, plumbing, electrical work, permits, materials, or sequencing. Once construction is underway, those open questions become change orders, delays, extra labor, and rework. Making the key renovation decisions before construction prevents most of them.
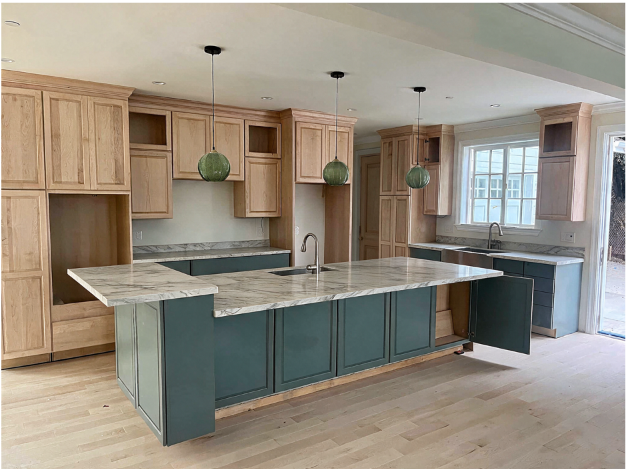
Throughout this article, we’ll refer to one real project: a 2023 Denali kitchen renovation in Los Angeles that turned a closed-off galley kitchen into an open, modern organic kitchen and great room.
Start With the Layout, Not the Finishes
Table of Contents
Decide what is moving
A renovation becomes more complicated when the layout changes. Moving a sink can mean new supply and drain lines, moving a toilet can affect the waste line and floor structure, and removing a wall can turn a room update into a structural project.
Before choosing finishes, mark the new locations of walls, doors, windows, cabinets, appliances, plumbing fixtures, outlets, and major lighting. The drawing doesn’t need to be beautiful; it needs to answer what goes where.
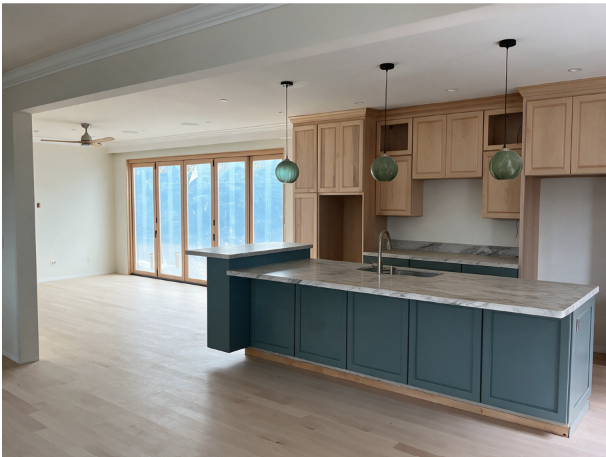
For the Los Angeles kitchen, the layout was the project: a single island replacing the narrow galley, an open sightline into the dining and family rooms, and the farmhouse sink beneath a garden window. Once the island, sink, and appliance wall were fixed on the plan, everything else could be designed around them.
Check whether the walls are structural
Wall thickness alone does not tell you whether a wall is load-bearing, and in older Los Angeles homes that have been remodeled more than once, the existing structure may not match the original plans. If a wall is coming out or a large opening is being created, determine the structural requirement before demolition.
“Non-bearing” doesn’t always mean “no structural work.” The walls Denali removed on the galley project weren’t load-bearing, but the opening still required reinforcing the ceiling with a 24-foot LVL beam, exactly the kind of requirement you want identified at the design stage, not after the walls are down.
Resolve the Hidden Construction Before You Price the Visible Work
Look behind the walls
You cannot see everything before demolition, but you can identify where uncertainty is likely. Older plumbing, outdated wiring, damaged framing, previous water intrusion, and unsuitable subfloors can all change the work once surfaces are opened.
A bathroom that appears to need only new tile and fixtures may also require waterproofing, plumbing, electrical, ventilation, and subfloor repairs. My Home Impro’s bathroom renovation cost guide draws the same distinction between a cosmetic update and a renovation involving construction work.
Separate known work from unknown conditions
Don’t treat every possible problem as a certainty.
Separate what you know, what needs further investigation, and what could reasonably turn up during demolition. That gives the contractor something useful to price and shows you where contingency money may actually be needed.
Coordinate Plumbing, Electrical and HVAC Before Walls Close
Every system needs a place to go
A new layout only works if the house systems can support it. An island may need outlets, a larger range may need a new circuit and ventilation, and recessed lighting affects ceiling framing and electrical runs.
The Los Angeles kitchen is built around a 48-inch range, which brings supply, ventilation, and clearance requirements that had to be planned alongside the cabinetry. The three ribbed glass globe pendants over the island meant fixing their electrical locations before the ceiling was closed.
Think about the next trade
One trade should not have to undo another trade’s work.
Plumbing and electrical rough-ins need to account for cabinet dimensions, HVAC runs need to work with framing, and lighting needs to work with the final ceiling and furniture layout. Forget an outlet, drain, or duct, and you’ll be cutting into a finished wall.
Make Material Decisions That Affect the Build
Not every finish needs to be chosen early
You don’t need to pick every paint colour before construction.
You do need to decide the products that affect dimensions, installation, structure, or rough-ins: cabinetry, appliances, countertops, windows, doors, plumbing fixtures, shower systems, flooring thickness, and major lighting.
Check the installation requirements
A thick countertop affects cabinet height and appliance clearances. A different flooring material can change finished floor height. Large-format tile may need a flatter substrate, and a wall-mounted vanity needs support before the wall is closed.
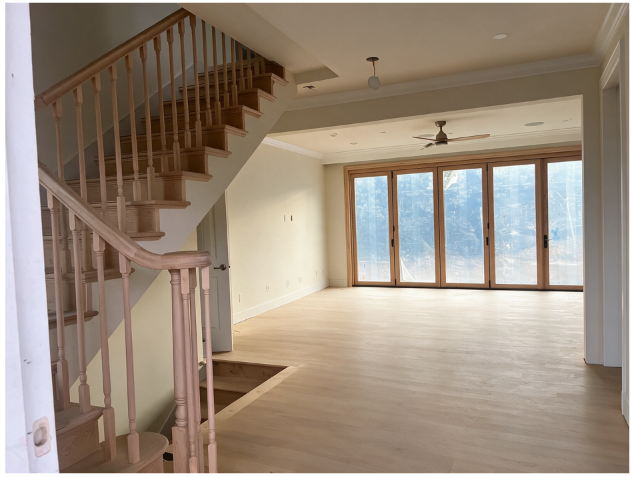
On the galley project, flooring was a construction decision. Removing two walls left gaps in the old floor, and the design called for wide-plank natural oak running continuously through the kitchen and great room. Choosing it early meant the subfloor could be prepared as one surface, with the same oak carried onto a staircase framed and finished on site. My Home Impro’s guide to preparing a subfloor before laying anything explains why the surface underneath matters as much as the finish.
Lock Down Kitchen Decisions Before Ordering Cabinets
Cabinet dimensions drive other work
In a kitchen, the cabinet plan drives appliance locations, outlets, plumbing, countertops, lighting, and sometimes flooring. Resolve the refrigerator, range, dishwasher, sink, island, and cabinet runs before ordering custom components.
The Los Angeles kitchen used floor-to-ceiling custom oak cabinetry with panel-ready niches for the major appliances. Each niche is sized to a specific unit, so the exact models had to be chosen before the boxes were built. Swapping a refrigerator late would have meant rebuilding cabinetry, not just returning an appliance.
Check the working clearances
A kitchen can fit on paper and still work badly.
Check door swings, appliance clearances, walkway widths, landing areas, and island circulation. My Home Impro’s guide to modular kitchen layouts that work in small apartments makes the same point: circulation and landing space matter more than fitting in more cabinets.
Finalize the Details That Affect Measurements
Custom work needs accurate dimensions
Cabinetry, countertops, shower glass, windows, doors, and built-ins all depend on measurements. Don’t order a custom item just because an early drawing shows the right size, since field conditions can change it, but don’t wait so long that lead times become a problem. Establish which dimensions are preliminary and which are final, then schedule field measurements accordingly.
The multi-panel folding doors that open the Los Angeles kitchen to the backyard are built to a specific rough opening, so the framing, header, and finished floor height all had to be confirmed before ordering.
Do not treat countertops as an afterthought
Countertops are fabricated around the cabinets, appliances, sink, and walls, so changing any of those after fabrication can mean replacing more than one product.
The sage green island on the galley project carries a waterfall countertop that wraps down both ends, leaving almost no margin for error; the island’s final dimensions had to be locked before templating. For material choices, see My Home Impro’s kitchen countertop comparison guide.
Check Permits, Drawings and Engineering Before Demolition
Find out what needs approval
Permits are not something to discover after the crew has started.
Structural changes, additions, electrical, and plumbing work may require permits, drawings, engineering, or inspections, and Los Angeles hillside projects can add structural, grading, or soils review.
Get the construction documents to a usable stage
The drawings should give the contractor enough information to understand the layout, dimensions, major systems, and construction requirements before work starts. That is the point of a proper pre-construction process; Denali’s includes site assessment, space planning, material selection, architectural drawings, and permit coordination.
Build the Contingency Around the House, Not a Guess
Use 15% as a baseline
Keep a contingency outside the planned project cost. For a straightforward renovation, 15% is a useful starting point. On an older property or a project with substantial demolition, structural work, or outdated systems, 20% is more realistic.
Know what the contingency is protecting
It covers concealed conditions that only show up once demolition starts: damaged framing, deteriorated plumbing, electrical upgrades, subfloor repairs, water damage, and structural reinforcement. If you never use it, it remains yours. If you need it, the project doesn’t stop because the budget assumes the house would behave perfectly.
For how contingency fits into the total budget, see My Home Impro’s guide to planning a renovation without blowing the budget.
Sequence the Decisions Before You Sequence the Trades
Design before demolition
The basic order is straightforward:
- Confirm the existing conditions.
- Finalize the layout.
- Resolve structural requirements.
- Coordinate plumbing, electrical and HVAC.
- Select materials that affect construction.
- Complete drawings and approvals.
- Order long-lead materials.
- Start demolition and construction.
You will not always follow that list perfectly, but the principle matters.
Know which changes create a chain reaction
Changing a paint colour late is annoying. Moving a shower drain after waterproofing, changing cabinet dimensions after electrical work, or relocating an appliance after the countertop is fabricated is expensive.
Before approving a change, ask: what else has to change if we do this? On the galley kitchen, moving the island even a few inches would have affected the pendant boxes, the waterfall countertop, the flooring layout, and the walkway to the folding doors. If the answer involves other trades, make the decision before they begin.
The Design Phase Is Where You Protect the Budget
You can compare three contractor quotes and still have three different projects if the drawings, materials, existing conditions, and scope are unclear. That is why the technical decisions need to happen before construction, not during it.
For homeowners in Los Angeles and Southern California, that can mean reviewing the existing structure, coordinating building systems, resolving the layout, selecting construction-critical materials, and addressing permits before demolition.
Why Choose Denali Builders & Design?
Denali Builders & Design brings the design and construction sides of residential remodeling together, serving homeowners across Los Angeles, Riverside, and Orange County.
A well-organized pre-construction planning and design process can help bring the design, construction scope, material decisions, and existing conditions together before work begins. Our Los Angeles work includes kitchens, bathrooms, additions, ADUs, and whole-home renovations.
For homeowners planning a renovation, the advantage is straightforward: the decisions that affect construction are addressed before the project gets too far down the road.
Denali Builders & Design
Los Angeles, Riverside & Orange County
(818) 290-6430
office@denalibuilder.com
Author Bio

Tom Zehavi is the founder of Denali Builders & Design, a licensed general contractor serving Los Angeles, Orange County, and Riverside. His lifelong passion for building and design is evident in every kitchen, bathroom, ADU, and whole-home remodel his team delivers. Tom believes great construction starts with honest communication, careful craftsmanship, and bringing each client’s vision to life.
More in HOME IMPROVEMENT

How to Plan a Home Renovation Without Blowing the Budget
Most renovation overruns are not caused by expensive materials. They are caused by decisions made in the wrong order.

Small Home Repairs That Are Worth Doing Before You Sell
A handful of low-cost fixes change how a buyer reads the whole property. Most big-ticket upgrades do not.

Is Building a Sunroom Worth the Investment?
For many Sydney homeowners, the answer is a confident yes when it is planned strategically and built by experienced professionals.…